Nail Designs Floral Nail Art Design
Floral nail art has long been a favorite among those seeking to add a touch of nature-inspired beauty to their nails. Whether it’s the delicate petals of a daisy, the bold beauty of roses, or the soft elegance of lavender, floral designs are versatile, chic, and perfect for any occasion.
In this post, we’ll explore the timeless charm of floral nail art, offering inspiration for those looking to embrace this classic trend with a modern twist.

The Beauty of Floral Nail Art
Floral nail designs are incredibly diverse. They can be simple and minimalistic, featuring just a few blossoms, or intricate and detailed, with vivid colors and delicate shading. The beauty lies in their versatility, allowing you to express your personality through colors, shapes, and patterns.
For those who prefer a subtle look, soft pastel florals can add a whisper of sophistication to your nails. Think pale pink petals or white lilies against a nude or light background. On the other hand, if you’re feeling bold, vibrant tropical blooms in oranges, reds, and yellows can create a statement that’s both lively and eye-catching.
How to Achieve the Perfect Floral Nail Art
Creating floral designs may seem challenging, but with the right tools and techniques, anyone can achieve stunning results. Here’s a step-by-step guide to getting the perfect floral nails:
- Choose Your Base Color: Start by selecting a base color that complements your floral design. Light, neutral tones such as beige, pale pink, or even a soft lavender often work well as a backdrop for flowers. However, don’t hesitate to experiment with bolder shades for a more striking contrast.
- Select Your Floral Colors: Pick colors that will stand out against your base. If you’re going for a soft, romantic look, choose pastels like mint, blush, or lavender. For a more vibrant design, opt for bright shades like coral, red, or yellow.
- Use Fine Detail Brushes: For more intricate floral designs, using fine detail brushes will help you create delicate petals and leaves. Practice making small, gentle strokes to shape each flower, adding details like dots or veins for extra depth.
- Accent with Leaves and Stems: To add a natural touch, don’t forget to include leaves and stems. Soft greens or even metallic golds can make the floral patterns pop, enhancing the overall design.
- Top It Off with a Glossy or Matte Finish: A top coat not only seals in your design but also adds that final touch of elegance. Whether you prefer a glossy shine or a chic matte look, the finish can make a big difference in the overall feel of your floral nails.
Floral Nail Art Ideas
If you’re looking for inspiration, here are a few floral nail art designs to consider:
- Dainty Daisies: A classic yet simple design, dainty white daisies on a pastel background exude a soft, feminine vibe that’s perfect for spring or summer.
- Roses in Bloom: Red or pink roses against a neutral base create a timeless, romantic look. This design pairs beautifully with evening wear or formal occasions.
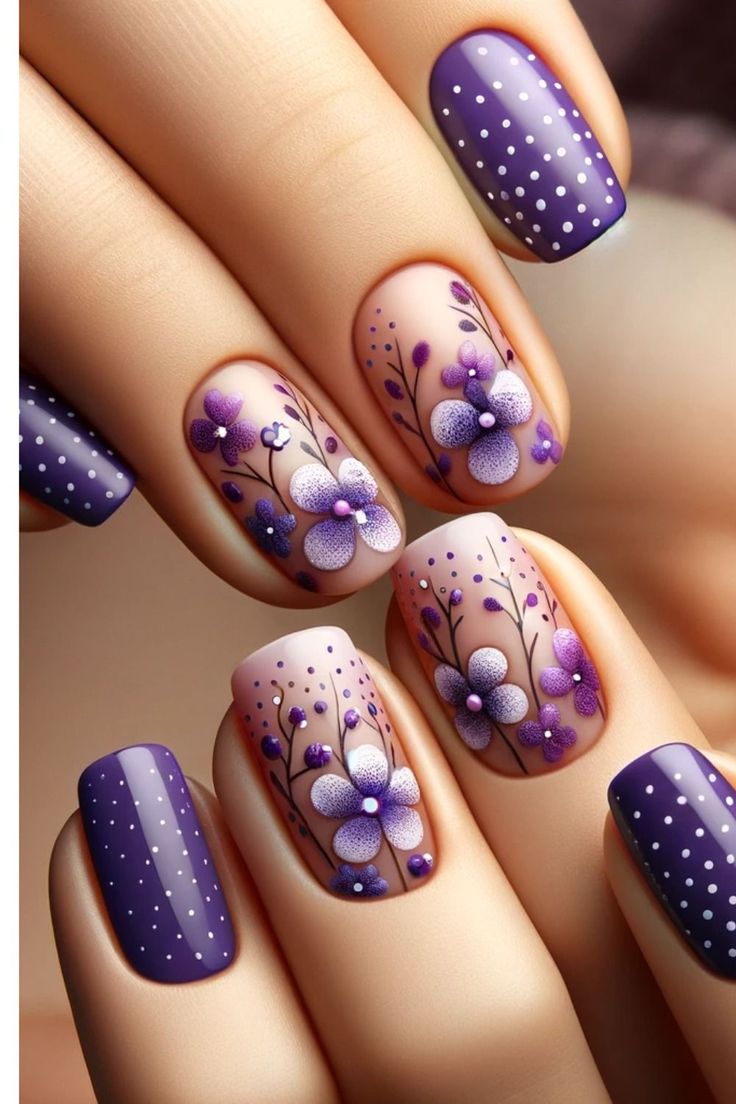
- Lavender Fields: Soft purple lavender sprigs on a light cream or beige base offer a calm and elegant appearance, ideal for those who prefer understated designs.
- Bold Tropical Flowers: For a summer-ready look, opt for large, colorful flowers like hibiscus or sunflowers. These vibrant designs are fun, playful, and perfect for vacation nails.
Final Thoughts
Floral nail art designs offer endless possibilities for creativity. Whether you’re going for a delicate, subtle look or a bold, colorful statement, there’s a floral design that’s perfect for you. With the right tools and a bit of practice, you can easily create a look that’s not only beautiful but also reflects your personal style.
Take a moment to relax, let your creativity flow, and embrace the timeless beauty of floral nails. Your hands will carry a touch of nature’s elegance wherever you go.


